LG Washer Not Draining – Complete Troubleshooting and Repair Guide

If your LG washer is not draining, it can quickly turn a normal laundry day into a stressful repair challenge. You may notice standing water in the drum, hear rattling noises from the pump, or see the washer struggling to complete its cycle. Fortunately, this issue is common — and with the right guidance, you can repair it yourself without spending hundreds on technician visits.
In this complete guide, I’ll walk you through how to troubleshoot, disassemble, and repair an LG front load washer that won’t drain. Based on a real repair process, you’ll learn how to inspect hoses, access the drain pump, and safely replace faulty components.
Whether you’re a DIY enthusiast or just trying to save time and money, this tutorial gives you everything you need to bring your washer back to life.
Understanding Why Your LG Washer Is Not Draining
When your LG washer won’t drain, the cause is usually mechanical or obstruction-related. The water from the drum needs to flow through a drain hose, pump, and filter system. If any of these are blocked or damaged, the water will remain inside the tub.
Here are the most common reasons for this issue:
- Clogged drain hose – lint, coins, or small clothing items can block water flow.
- Faulty drain pump motor – if the pump blade is broken, it can’t move water efficiently.
- Electrical issues – loose wiring or damaged harnesses can prevent the pump from activating.
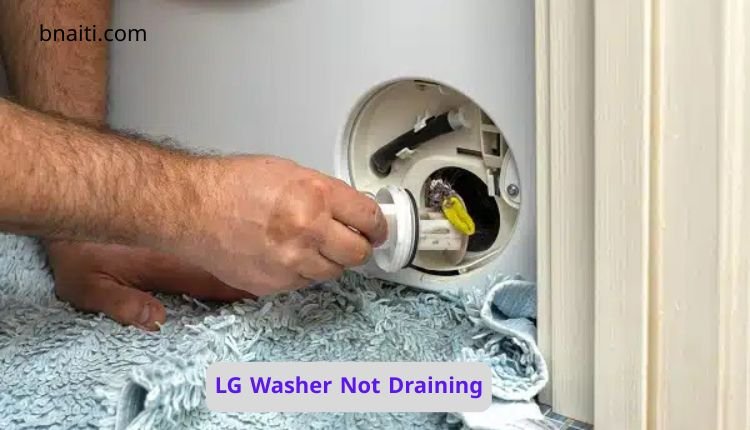
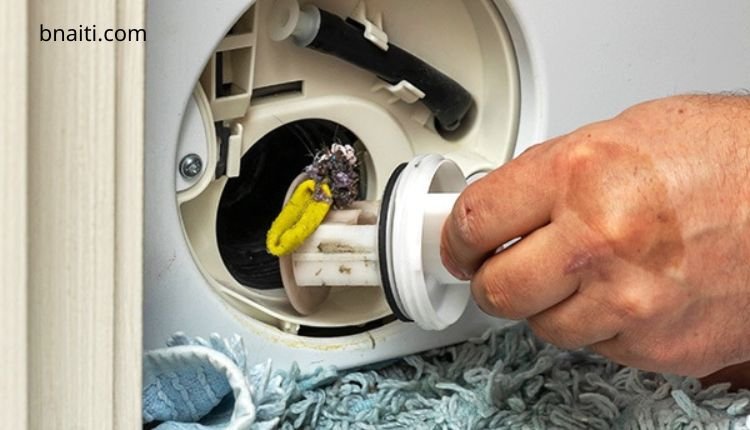
- Obstructed pump filter – if the filter is full of debris, water won’t pass through.
- Improper installation or kinked hose – the hose must be positioned correctly for gravity drainage.
Before jumping into a full disassembly, it’s essential to start by checking the simple things first, like hoses and filters. This not only saves time but also avoids unnecessary replacements.

Safety Precautions Before Starting the Repair
Repairing an LG washer requires handling both water and electricity, so safety must come first. Before you start, make sure to:
- Unplug the washer from the power outlet to prevent electric shock.
- Wear gloves and long sleeves to protect yourself from sharp metal edges.
- Prepare towels or a flat pan to collect water that might spill when you open the drain system.
- Have proper tools ready — including a screwdriver, pliers, and a 13/32-inch drill bit.
- Keep a shop vacuum or small container nearby to remove excess water from the washer drum.
Following these steps ensures you can focus on the repair without accidents or messes.
“Read Also: LG vs Samsung Washing Machines“
Initial Diagnostic – Checking the Drain Cycle
To confirm that the LG washer not draining issue is indeed caused by a drain problem, start a normal wash cycle. Allow the washer to fill with some water, and then switch it to the drain mode.
If you can hear the pump motor but the water doesn’t move, that indicates a blockage or a broken impeller. A rattling or humming noise often points to a damaged pump motor. On the other hand, if you hear nothing at all, it might be an electrical connection failure or a burned-out pump.
Once you’ve confirmed the issue, it’s time to move to the next step — disassembling the washer to access the drain pump.
“Read Also: LG FCV309WNE Washing Machine Review“
Step-by-Step Guide to Disassembling the LG Front Load Washer
This is the most critical part of the repair process. We’ll go step-by-step so you can safely open your washer, locate the faulty components, and prepare for replacement.

1. Remove the Front Panel
Start by unscrewing the bottom screws that hold the lower plastic cover in place. When you remove this panel, be ready for water leakage if there’s still liquid inside the tub.
Next, take out the black drain filter — this part often contains trapped coins, lint, or other debris. Have a flat pan underneath to collect any leftover water.
Then, remove the spring clamp using needle-nose pliers to loosen the rubber boot connecting the front door gasket. This gives you access to the internal assembly.
2. Remove the Top Panel and Control Section
Unscrew the two Phillips screws on the back of the top cover. Slide it back gently, then lift it off the hooks to release it completely.
Once the top is off, remove the screws securing the control panel and detergent drawer section. Disconnect the wire harnesses carefully — these are fragile and should be handled gently to prevent damage.
3. Detach the Door Switch and Wiring Harness
Now, remove the two screws securing the door switch. You can either pull the switch out from the front or disconnect its harness from behind. The first option is often easier when reinstalling.
Remember: the edges inside the washer are sharp, so be cautious when reaching inside. Gloves are highly recommended.
4. Remove the Drain Pump Assembly
Once you reach the lower section, locate the drain pump housing. Use a 13/32-inch socket or bit to remove the three screws that secure it to the frame.
Then, disconnect the drain hoses attached to the pump. You might need to use pliers or channel locks to remove the clamps holding them in place. Be careful — the hoses may still contain residual water.
At this point, you’ll have clear access to the pump motor and housing.
“Read Also: LG 2025 Front Load Washing Machine Review“
Replacing or Repairing the Drain Pump
Now that the washer is open, you have two repair options depending on the situation:
- Replace only the drain pump motor
- Replace the entire drain pump housing assembly
If the housing is undamaged and only the motor or impeller blade is broken, it’s cheaper and easier to replace just the motor. However, if the pump body is cracked or leaking, go for the full assembly replacement.
When to Replace Only the Pump Motor
Inspect the pump impeller closely. If it’s broken, loose, or disconnected from the motor shaft, this explains why your LG washer is not draining.
Remove the three screws holding the motor, detach the old one, and replace it with the new motor.
Ensure that the rubber gasket between the motor and the housing is properly aligned to prevent leaks. Tighten all screws securely but avoid overtightening, as the housing is made of plastic and can strip easily.
When to Replace the Whole Housing
If your pump housing has cracks, corrosion, or worn rubber seals, replacing the entire assembly is more reliable.
Remove the three screws attaching the housing to the metal bracket. Once done, disconnect the back drain hose — but be prepared, as this hose is thin, flexible, and difficult to reattach.
You can purchase an OEM LG drain pump assembly online or from appliance parts stores. Always double-check your model number to ensure compatibility.
“Read Also: How Washing Machines Work“
Common Challenges During the Repair
Even with experience, repairing an LG washer not draining can be frustrating. Here are a few common issues you may encounter and how to fix them:
- Stubborn clamps: Some drain clamps are very tight. If pliers aren’t working, consider replacing them with adjustable metal clamps (available at hardware stores).
- Leaking hoses: After reassembly, check for leaks by running a short cycle. If water drips, the clamp might be misaligned or the gasket not seated correctly.
- Limited working space: LG washers are compact, making it hard to maneuver tools. Tilting the machine slightly backward can help.
- Disconnected rubber boots: The door boot gasket can slip off easily when reinstalling. Make sure it’s seated evenly with the spring wire in place.
Patience is key — even professionals spend hours ensuring every connection is tight and leak-free.
Reassembling the Washer After Repair
Once you’ve installed the new pump or housing, it’s time to put everything back together:
- Reconnect all wire harnesses to their original positions.
- Reattach the front panel, ensuring all screws and clips are secured.
- Install the door switch using the two front screws.
- Reconnect the rubber boot with the spring wire using pliers or the special tool.
- Reinstall the top cover and slide it into place until it locks onto the hooks.
- Plug the washer back in and prepare for a test run.
Testing the Washer After the Repair
With the washer fully reassembled, start a short cycle with no clothes. Let the washer fill with some water, then switch to drain mode.
Listen carefully — you should hear the pump running smoothly without rattling. Check for any water leaks from the bottom or back.
If everything works fine and the water drains completely, congratulations — you’ve successfully fixed your LG washer not draining problem.
Preventing Future Drainage Problems
To avoid running into this issue again, follow these maintenance tips:
- Clean the drain filter at least once a month to prevent clogs.
- Avoid washing small items like socks or coins without a laundry bag — they can slip into the drain system.
- Check hoses regularly for kinks, buildup, or cracks.
- Use the correct detergent and avoid overloading the washer.
- After each cycle, leave the washer door open for a while to let the interior dry and prevent mold buildup.
Simple maintenance habits can extend the life of your washer and reduce repair costs.
When to Call a Professional
While most LG washer not draining problems can be fixed at home, there are times when calling a technician is the safest option.
Seek professional help if:
- The washer doesn’t power on even after checking connections.
- The control board displays error codes you can’t clear.
- You’ve replaced the pump, but the issue persists.
- You notice electrical burning smells or sparks.
Qualified technicians have the tools to diagnose advanced electrical issues that go beyond DIY repair.
LG Washer Not Draining: The Conclusion
Dealing with an LG washer not draining can feel overwhelming at first, but with patience and the right steps, it’s a repair you can absolutely handle yourself. By checking hoses, replacing the drain pump, and ensuring every connection is secure, you can restore your washer’s performance and save money on service calls.
Always remember to prioritize safety, follow each step carefully, and take your time during reassembly. After completing this repair, you’ll not only have a fully functioning washer but also the satisfaction of knowing you fixed it yourself.
If this guide helped you solve your problem, consider sharing it with others facing similar issues — a little DIY confidence can go a long way.


