The Ultimate Guide to Loading Your Dishwasher: Say Goodbye to Dirty Dishes and Arguments

Have you ever found yourself embroiled in a heated debate over the “correct” way to load a dishwasher? Or perhaps you’ve pulled out a load only to discover stubbornly dirty dishes, forcing a re-wash and wasting precious time, water, and energy. If this sounds familiar, you’re not alone.
The seemingly simple act of loading a dishwasher is, in fact, a science that, when mastered, can save you frustration, money, and even prevent damage to your appliance and dishes.
Improper dishwasher loading isn’t just about aesthetics; it directly impacts cleanliness, can lead to costly repairs, and significantly increases your utility bills in the long run.
When dishes are overloaded or placed incorrectly, water and detergent can’t reach all surfaces effectively, resulting in caked-on food and grime. Furthermore, obstructing spinning arms or placing delicate items in the wrong spot can cause damage.
This comprehensive guide will clear up all the confusion, providing you with the definitive roadmap to loading your dishwasher like a pro, ensuring pristine results every single time.
Mastering the Top Rack: Delicate & Lightweight Essentials
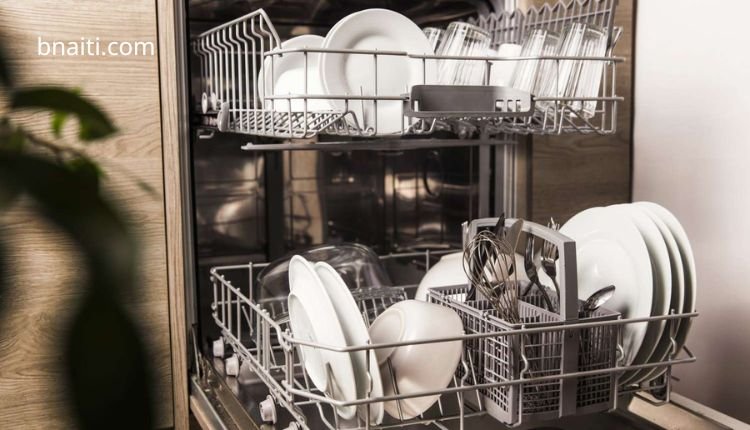
The top rack of your dishwasher is typically reserved for items that require a gentler wash or have specific clearance needs. Understanding what goes where is crucial for both cleanliness and preventing damage.
What Belongs on Top
- Glasses and Cups: Position them upside down to prevent water from pooling and ensure thorough cleaning.
- Small Bowls: Similar to cups, place them face down for optimal water exposure.
- Utensils: Lightweight serving spoons or spatulas can often find a home here if your cutlery basket is full.
- Dishwasher-Safe Plastic: Plastic items are generally lighter and can warp under intense heat, making the top rack the ideal spot where heat is typically less intense.
- Utility Bags or Baskets: Any small, dishwasher-safe accessories can be placed here.
Spinning Arm Clearance is Key
Before closing the dishwasher door, always perform a quick check: manually spin the top spray arm to ensure no tall items are obstructing its rotation. Many dishwashers have a spinning arm on the bottom of the top rack, and even a slight obstruction can severely impede the cleaning performance for both racks. If the arm can’t spin freely, water won’t be distributed evenly, leading to poorly washed dishes.
Avoiding the Overcrowding Trap
It’s tempting to cram every dirty dish into a single load, but overcrowding is a cardinal sin of dishwasher loading. Whether on the top or bottom rack, if items are too close together, water and detergent simply cannot reach all surfaces. This results in food residue remaining on your “clean” dishes, necessitating a re-wash. Give each item ample space to “breathe” and allow water to circulate freely around it for a truly spotless clean.
Optimizing the Bottom Rack: Heavy-Duty Cleaning Power

The bottom rack is the workhorse of your dishwasher, designed to handle larger, more robust items that can withstand direct, powerful jets of water.
What Belongs on Bottom
- Pots and Pans: Ensure they are dishwasher-safe. Place them face down or with their bottoms facing up and slightly angled to allow water to drain and prevent pooling.
- Dinner Plates: This is their primary home. Larger plates go in the bottom rack.
Crucial Spray Arm Clearance
Just like the top rack, the bottom rack also has a spinning spray arm, often located directly beneath the top rack and another at the very bottom of the appliance. It’s imperative that pots, pan handles, or large plates do not obstruct either of these arms. Ensure full rotation is possible to guarantee proper water distribution throughout the entire wash cycle.
Strategic Plate Placement
Loading plates effectively can significantly improve cleaning performance:
- Staggering is Best: Instead of grouping all large plates together and small plates together, mix them up. This staggering allows for better water flow and prevents items from “nesting” and blocking water from reaching adjacent dishes.
- Face the Center: A highly effective technique is to face all dishes towards the center of the dishwasher. This concentrates the cleaning power of the jets onto the soiled surfaces, preventing food particles from being flung to the sides and stuck. Load half your dishes facing one central point, and the other half facing the opposite central point. This small adjustment can make a big difference in cleanliness.
The Pre-Wash Debate: To Rinse or Not to Rinse?
This is a long-standing question with varied answers, often depending on your dishwasher’s manufacturer. Some modern dishwashers are designed to handle significant food debris, while others recommend a light scrape.
Manufacturer Recommendations
Always consult your dishwasher’s manual or the manufacturer’s website. They will have specific guidance on whether pre-rinsing or simply scraping is recommended for your particular model. Different dishwashers have different filtration systems and cleaning capabilities.
Our Experience: Scrape, Don’t Necessarily Rinse
From personal experience, a quick scrape of large food chunks into the compost bin or trash is often sufficient and highly beneficial. While you don’t need to meticulously rinse every plate until it’s spotless, removing significant residue prevents your dishwasher’s filter from clogging and minimizes the risk of food buildup over time.
Dishwashers are designed to wash off food particles, but they aren’t garbage disposals. Scraping leaves just smears of sauces or small bits, which the dishwasher can easily handle, leading to better overall results and less maintenance for you.
Cutlery Conundrums: Getting Utensils Spotless
Cutlery (or silverware, depending on your region) requires specific attention to ensure every fork tine and spoon curve comes out sparkling.
Loading Guidelines
- Sharp Knives Down: For safety, always place small, sharp knives (like paring knives) with the blade pointing down into the cutlery basket. This prevents accidental cuts when unloading.
- Other Cutlery Up: For forks and spoons, facing them upwards allows for maximum exposure to water jets, resulting in a cleaner wash. If you prefer to place other knives down for safety, that’s acceptable, but they might not get as clean as when facing up.
- Mix It Up to Prevent Nesting: A common mistake is grouping all forks together, all spoons together, etc. This leads to “nesting,” where utensils spoon or fork together, blocking water and preventing thorough cleaning. Instead, mix forks, spoons, and knives (excluding sharp ones) throughout the basket. This ensures water can circulate around each piece.
Cutlery Basket Lids
Some cutlery baskets come with a flap or lid with individual slots. The purpose of this lid is to keep smaller items separate and secure, preventing them from flying around during the wash cycle. If your basket has one, utilize it for optimal cleaning and item security.
“Read Also: حل مشكلة غسالة الأطباق لا تسحب الماء“
What NEVER Belongs in Your Dishwasher
While the dishwasher is a marvel of modern convenience, some items should strictly be kept out to preserve their integrity and your appliance.

1. Chef’s Knives & Large Kitchen Knives
- Wood Handles: Wood handles will warp, crack, and become discolored in the dishwasher’s hot, wet environment.
- Dulling/Warping: The aggressive jets and vibrations can dull the sharp edge of a knife over time, making it less effective.
- Rack Damage: A sharp knife can cut through the vinyl coating on dishwasher racks, exposing the metal underneath. This leads to rust, which can then stain your dishes and spread.
2. Brass, Bronze, Gold-Plated, Pewter, or Silver Items
These delicate metals and platings can tarnish, discolor, or be completely ruined by the harsh detergents and high heat of a dishwasher. Hand washing is always the safest bet to maintain their luster and extend their lifespan.
Items like copper Moscow Mule mugs will lose their beautiful finish and become unrevivable if machine-washed.
3. Wood Utensils and Cutting Boards
Wood is naturally porous and will absorb water. The dishwasher’s hot, humid environment causes wood to warp, crack, expand, and become rough. This not only ruins the item but can also harbor bacteria in the damaged surfaces. A quick wipe with soapy water and occasional oiling is the proper care.
4. Cast Iron Cookware
Cast iron relies on a seasoned surface for its non-stick properties and protection against rust. Dishwashing will strip this seasoning, leading to rust and requiring a complete re-seasoning process. Always hand wash and dry cast iron immediately.
5. Non-Stick Pots and Pans (Check Manufacturer!)
While some non-stick cookware claims to be dishwasher-safe, the abrasive detergents and high heat can degrade the non-stick coating over time, reducing its effectiveness and lifespan. Always check the manufacturer’s recommendations; when in doubt, hand wash.
6. Stemmed Wine Glasses, Champagne Flutes, and Delicate Stemware
These items are highly fragile and prone to breaking during the wash cycle due to vibrations and proximity to other items.
- Broken glass in a dishwasher is a hazard and a nightmare to clean.
- Even if they survive, dishwasher washing can lead to micro-scratches and “spider webbing” that dulls their clarity.
Hand wash all stemware, whether inexpensive or precious crystal.
7. Pottery, Hand-Painted/Glazed Items, Acrylic, and Glued Items
- Pottery: While some is durable, why risk damaging a cherished piece? Hand wash special pottery.
- Painted/Glazed Items: The heat and detergent can cause paint or glazes to chip, fade, or peel off.
- Acrylic: Acrylic plastics can warp, melt, or become cloudy.
- Glued Items: The heat can weaken and melt adhesives, causing items to fall apart.
“Read Also: غسالة الأطباق لا تصرف الماء“
Unexpected Items You CAN Dishwash

Beyond dishes, your dishwasher can be a secret weapon for cleaning a surprising array of household items.
Cleaning & Utility Items
- Buckets and cleaning brushes (ensure no wooden handles).
- Range hood filters (remove excess grease first).
- Sink strainers.
- Squeegees.
- Dustpans.
Kids’ Items
- Teething rings.
- Plastic kids’ toys (ensure no batteries or delicate electronics).
Kitchen & Home Accessories
- Microwave turntables.
- Silicone trivets and mats.
- Dishwasher-safe vases.
Choosing the Right Detergent & Rinse Aid
The right cleaning agents are just as important as proper loading for achieving spotless results.
Detergent Options
- Powder: Economical but can be messy and sometimes leaves residue if too much is used.
- Liquid: Similar to powder, it requires careful measurement to avoid residue or insufficient cleaning.
- Pods/Tablets: Often the most convenient and mess-free option. They are pre-measured, ensuring correct dosage. Many users find pods deliver consistent cleaning performance. While finding effective eco-friendly options can be a challenge, mainstream brands often provide reliable results.
Correct Detergent Dosage
Whether using powder or liquid, precise measurement is key. Too much detergent can lead to excessive suds, leaving behind a scummy residue on dishes and inside the dishwasher. Too little, and your dishes won’t get clean. Pods simplify this by providing a pre-measured dose.
The Role of Rinse Aid
Rinse aid is a game-changer for preventing water spots and streaks, especially if you have hard water. It helps water sheet off dishes during the rinse cycle, promoting faster drying and a clearer finish.
While many pods include built-in rinse aid, if you use powder or liquid, consider adding liquid rinse aid to its dedicated dispenser in your dishwasher. This small addition makes a significant difference in the final appearance of your dishes.
“Read Also: حل مشاكل غسالة الأطباق“
Dishwasher Maintenance: Keeping Your Appliance Pristine
Your dishwasher isn’t a self-cleaning appliance; it needs regular maintenance to function optimally and prevent unpleasant odors or poor cleaning performance.
When Your Dishwasher Needs Attention
If your dishes are consistently coming out dirty, even after proper loading, it’s a clear sign your dishwasher needs a clean.
Key Maintenance Steps
- Clean the Filter Regularly: The filter, typically located at the bottom of your dishwasher, traps food particles. It needs to be removed and cleaned periodically to prevent blockages and odors. Consult your manual for exact removal instructions; it’s usually a simple twist-off mechanism.
- Run a Cleaning Cycle: Every few months, run an empty wash cycle with a specialized dishwasher cleaning tablet or a cup of white vinegar placed in a dishwasher-safe bowl on the top rack. This helps to dissolve grease, mineral buildup, and grime inside the appliance.
- Frequency: Aim to clean your dishwasher about four times a year, or once per season, for average use. If you run your dishwasher daily or multiple times a day, you might need to increase this frequency. Conversely, less frequent use might allow for cleaning twice a year.
Conclusion: Enjoy the Sparkle
Congratulations! You are now fully equipped with the knowledge to conquer the dishwasher conundrum once and for all. By understanding the proper placement for top and bottom racks, discerning what belongs and what absolutely doesn’t, optimizing detergent use, and performing routine maintenance, you can ensure your dishes emerge sparkling clean after every load.
No more crusty forks, water-filled bowls, or frustrating re-washes. You can finally rest easy, knowing you’re not just cleaning your dishes, but also extending the life of your appliance and saving energy.
So go forth, load with confidence, and enjoy the satisfaction of a truly clean kitchen.


